How Thick Does Ice Need to Be to Fish in Michigan
There's a specific kind of apprehension that sets in when you're staring at a frozen lake, gear in hand, wondering if the ice beneath your boots is truly solid enough to hold you. It’s a completely valid concern, and honestly, it’s one that every responsible ice angler in Michigan grapples with. The idea of falling through is terrifying, and the consequences can be dire. This guide is here to cut through the uncertainty, providing clear, actionable information on how thick the ice needs to be for safe fishing in Michigan, helping you make informed decisions so you can enjoy the hardwater season without undue worry.
The Critical Importance of Ice Safety
Ice fishing in Michigan is an exhilarating experience, offering a unique opportunity to target species like walleye, perch, and pike when other seasons are closed. However, the serene beauty of a frozen lake can mask serious dangers if you’re not vigilant about ice safety. We've all heard the stories, or perhaps even had a close call ourselves, where seemingly solid ice turned out to be anything but. It’s not just about getting wet; it's about the very real risk of hypothermia or worse. That’s why understanding ice thickness isn't just a recommendation; it's absolutely crucial for your well-being and the safety of anyone fishing with you.
Understanding the Hidden Risks of Thin Ice
Many factors can compromise ice strength, making a sheet of ice that looks perfectly safe incredibly dangerous. Subsurface currents from rivers or natural springs can erode ice from underneath, creating dangerously thin pockets even in areas that appear thick. Snow cover, while beautiful, can act as an insulator, slowing down ice formation and hiding thin spots. It can also weigh down the ice, pushing water up through cracks and creating slush, which then freezes into "white ice" – a weaker, more porous form of ice compared to clear, black ice. Without understanding these nuances, you could be stepping onto a minefield.
Imagine you're out on Houghton Lake, one of Michigan's largest inland lakes, known for its fantastic winter fishing. You've checked the ice near the public access point, and it looks solid. However, if there's a strong current from one of the lake's inlets a few hundred yards away, that current could be eating away at the ice beneath the surface, creating a deadly thin spot where you least expect it. This kind of localized variance is precisely why a universal "safe" thickness needs to be approached with caution and combined with constant, on-the-spot assessment.
Michigan's Official Ice Thickness Guidelines
The Michigan Department of Natural Resources (DNR) provides clear, straightforward guidelines on minimum ice thickness for various activities. These are not arbitrary numbers; they are based on extensive safety data and common sense. It’s vital to remember that these are minimum recommendations for clear, solid ice. If the ice is compromised by slush, cracks, or is consistently forming and melting, you should always add a buffer or stay off entirely. These guidelines are your first line of defense, but never your only one.
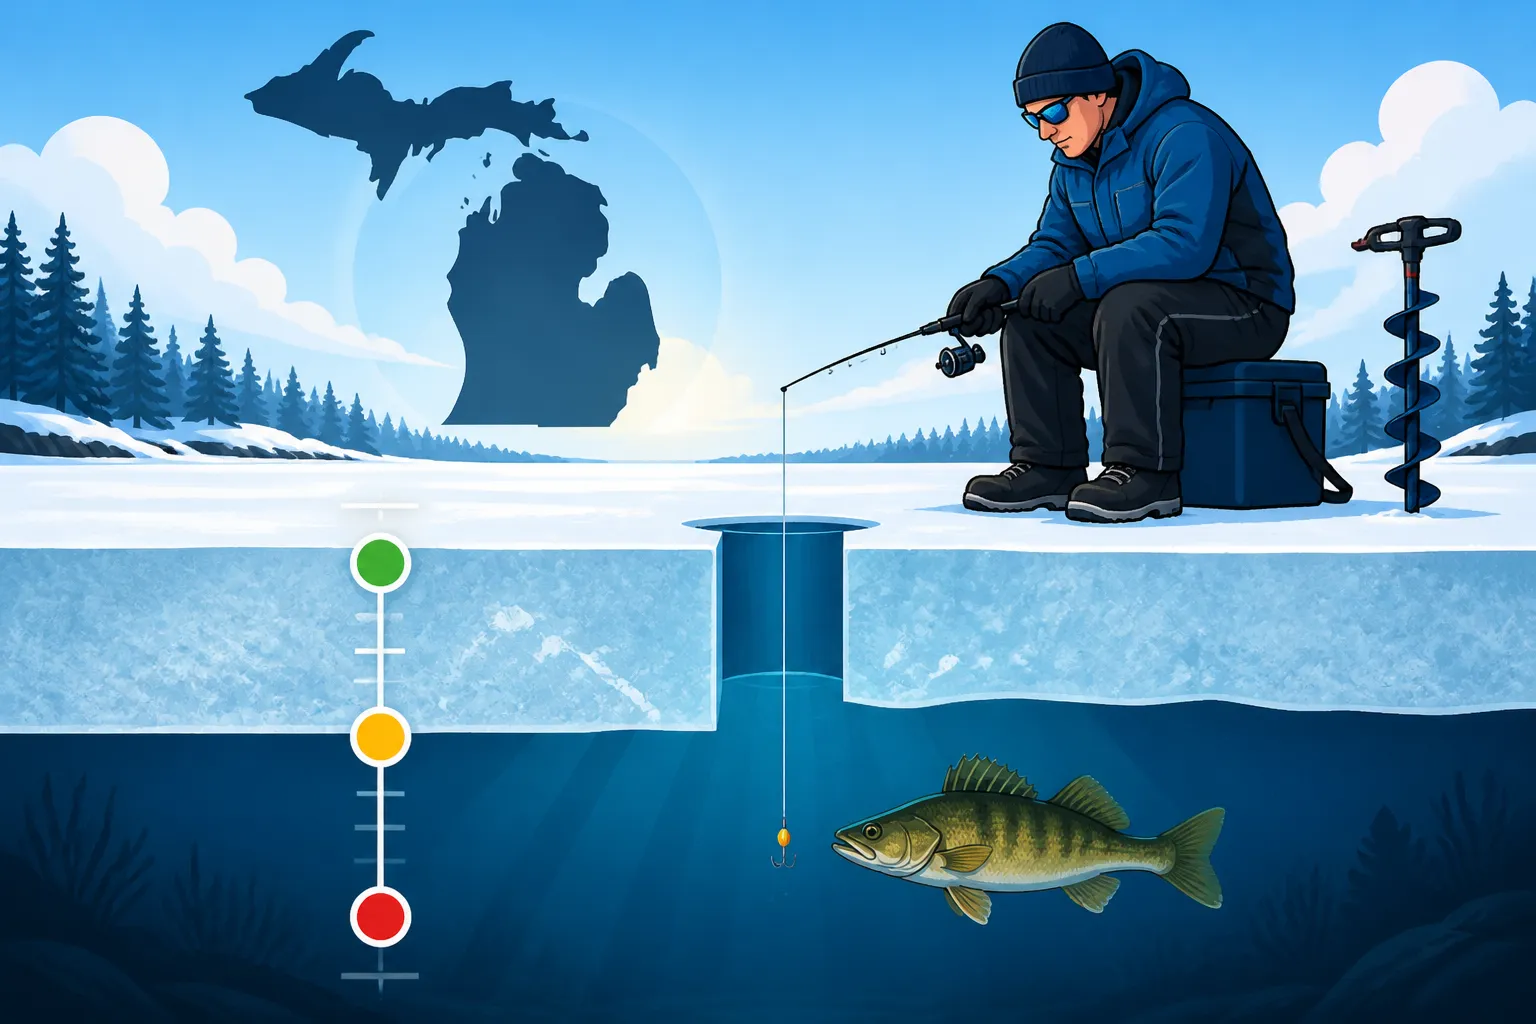
The DNR emphasizes that no ice is 100% safe, a mantra every angler should internalize. However, they provide these benchmarks to help you gauge risk:
- 2 inches or less: ALWAYS STAY OFF. Period. This ice won't support even a small child.
- 4 inches: Suitable for ice fishing on foot, solo angling, and small groups. This is the absolute minimum for walking.
- 5 inches: Good for snowmobiles and ATVs. The increased weight requires an extra inch of clear ice.
- 8-12 inches: Safe for small cars and light pickup trucks. This allows for more gear and comfort, especially for ice shanties.
- 12-15 inches: Supports medium-sized trucks and larger vehicles, like those pulling significant ice fishing shelters.
These guidelines are crucial, but they're a starting point. It’s like knowing the speed limit on a highway; you still need to adjust for traffic, weather, and road conditions. Always err on the side of caution. For more general guidelines, you can also check out our comprehensive guide on Michigan Ice Fishing Guide.
Deciphering the Ice Thickness Chart: What's Safe for You and Your Gear
Understanding the raw numbers is one thing, but translating them into practical application for your specific fishing plans is another. Not every ice fishing trip involves the same gear or group size, and therefore, not every trip requires the same minimum ice thickness. Let’s break down what different ice thicknesses mean for your adventure, from a quiet solo trip with just an auger and a bucket to a full-blown expedition with a heated shanty and a truckload of gear.
Bare Minimum for Solo Anglers
For the solo angler who prefers a lightweight approach, perhaps just a bucket, a rod, and a hand auger, the DNR's recommendation of 4 inches of clear, solid ice is the critical threshold. At this thickness, the ice can generally support the weight of an individual. However, even at 4 inches, you need to be extremely cautious. This is not the time for bravado or quick movements. Think about slowly and deliberately walking, constantly checking the ice ahead.
When you're alone, any mishap is amplified. If you fall through at 4 inches, there’s no one immediately there to help you. That’s why many seasoned anglers, myself included, prefer to see at least 5-6 inches before venturing out solo. It offers a small but significant buffer against unseen weak spots. Always wear a life jacket or a flotation suit, even if you feel competent on the ice. Having a set of ice picks easily accessible around your neck can be a lifesaver for pulling yourself out. If you're looking for specific gear, you can find a variety of safety equipment on Amazon, from flotation suits to ice picks.
Group Fishing and Portable Shelters
When you add more people, more gear, and especially a portable ice shelter, the weight on the ice increases exponentially. For group fishing or using a portable ice shelter, you should aim for a minimum of 6 to 8 inches of clear, solid ice. This provides a more robust platform to accommodate multiple individuals, the weight of an ice fishing shelter, propane heaters, coolers, and all the rods and tackle that come with a comfortable setup.
Consider a scenario where you're fishing with three friends and have a spacious pop-up shelter. That's four adults, plus the shelter, a heater, maybe a few tackle boxes, and a cooler full of snacks and drinks. This combined weight can quickly exceed what 4 or 5 inches of ice can comfortably support. Spreading out your weight is always a good idea, so avoid huddling too closely together, especially in smaller areas. When setting up your portable shelter, make sure it’s in an area you’ve thoroughly checked for consistent thickness. A small group might also find it useful to have a selection of tools on hand; something like a portable gas or electric auger, available from retailers like Amazon, can make quick work of checking ice thickness in multiple spots. You can also learn more about the gear you might need in our guide on What Gear Do You Need to Ice Fish in Michigan.
Vehicle Access: ATVs, Snowmobiles, and Cars
This is where ice thickness becomes critically important and where mistakes can have catastrophic consequences. Bringing motorized vehicles onto the ice is inherently riskier and demands much thicker, more consistent ice.
- Snowmobiles and ATVs: For these lighter, more agile vehicles, the DNR recommends a minimum of 5 inches of clear, solid ice. Even then, never travel in groups close together, and always maintain safe distances. Speed is a factor too; hitting a thin spot at high speed can be far more dangerous than slowly driving over it. Always check conditions before heading out, especially on a specific lake like Saginaw Bay, where currents can create varying ice conditions.
- Small Cars and Light Pickup Trucks: To drive a small car or light pickup truck onto the ice, you need a minimum of 8-12 inches of clear, solid ice. This is a significant jump from personal foot traffic. When you drive onto the ice, you're not just dealing with the weight of the vehicle itself, but also the dynamic forces of its movement, braking, and turning. Always drive slowly, keep windows down, have your seatbelt unbuckled, and be ready to exit if needed.
- Medium-sized Trucks and Larger Vehicles: For anything larger than a light pickup, such as a full-size truck or a larger SUV, you're looking at 12-15 inches of clear, solid ice. This is the highest risk category, and it should only be attempted when conditions are absolutely ideal and confirmed. Even with this thickness, many experienced anglers still opt to walk or use ATVs, as the margin for error with heavier vehicles is so small.
Remember, the weight distribution of a vehicle is different from a person. Tires create concentrated pressure points. Always have a recovery plan in place if you plan to drive a vehicle onto the ice, and consider bringing along specialized traction devices.
Here's a quick summary table of the Michigan DNR's general ice thickness guidelines:
| Activity / Weight | Minimum Clear, Solid Ice Thickness | Important Notes |
|---|---|---|
| Stay Off | 2 inches or less | Absolutely no activity. |
| Foot Traffic | 4 inches | Solo angler, walking. Exercise extreme caution. Wear flotation. |
| Snowmobile/ATV | 5 inches | Drive slowly, maintain distance from others. Constantly check conditions. |
| Group Fishing, Portable Shelter | 6-8 inches | Accommodates multiple people, gear, and temporary shelters. Spread out weight. |
| Small Car/Light Pickup | 8-12 inches | Drive slowly, seatbelt off, windows down. Check multiple access points. |
| Medium Truck/Heavy Shack | 12-15 inches | Highest risk. Only on ideal, confirmed ice. Have recovery gear. |
Factors Influencing Ice Strength: It's Not Just About Inches
While the thickness of the ice is undeniably the primary factor for safety, it’s far from the only factor. Anyone who's spent a fair amount of time on Michigan's frozen lakes will tell you that not all inches are created equal. You could have 6 inches of ice that feels solid as a rock, and another 6 inches that's soft, slushy, and dangerous. Understanding these nuances can literally save your life. It’s about more than just a ruler; it's about the quality and consistency of the ice itself.
The Ice Type Matters: Clear vs. White Ice
One of the biggest misconceptions about ice safety is that all ice of a given thickness offers the same strength. This simply isn't true. The strength of ice varies dramatically based on how it formed:
- Clear or "Black" Ice: This is the strongest type of ice. It forms when the air temperature drops steadily, and the water freezes slowly and uniformly, without snow or slush mixing in. It's called "black ice" because it's so clear you can often see right through it to the dark water below. This is the gold standard for ice strength; the DNR guidelines are based on clear, hard ice. For example, 4 inches of clear ice is generally stronger than 8 inches of white ice.
- White Ice, Snow Ice, or Slush Ice: This is significantly weaker. It forms when snow falls on thin ice and then freezes, or when slush on top of existing ice freezes. It often looks milky or opaque due to trapped air bubbles and water. While it adds to the overall thickness, its structural integrity is compromised. If you're walking on 6 inches of ice, and 3 of those inches are white ice, you essentially have the strength of only 3 inches of clear ice. Always assume white ice provides about half the strength of clear ice, and adjust your safety margins accordingly.
- Honeycomb Ice: This is the most treacherous of all. It typically forms during spring thaws or when a warm spell causes ice to melt unevenly, creating a crystalline structure that resembles a honeycomb. It might appear thick, but its integrity is severely compromised. It can collapse without warning, even under light weight. As the ice fishing season winds down, this is the type of ice that demands extreme caution. Understanding these different types of ice is critical, especially if you're planning on a late-season outing, when Michigan's Ice Fishing Season Timing might be nearing its end.
Local Conditions and Hidden Hazards
Beyond the type of ice, numerous local conditions can create dangerous pockets that are easy to miss if you're not paying attention. These hazards often don't advertise themselves, making careful observation and proactive testing essential:
- Currents and Inlets/Outlets: Rivers and streams flowing into or out of a lake create currents that constantly erode ice from beneath. Areas around the mouth of the Au Sable River or the Manistee River, even where they meet frozen lakes, will almost always have thinner, weaker ice. These spots are highly unpredictable.
- Springs: Submerged springs can pump warmer groundwater into a lake, creating circular areas of dangerously thin ice that might be completely surrounded by thick, safe ice. These are particularly dangerous because they are often invisible from the surface.
- Docks and Pilings: Structures like docks, bridge abutments, and pilings absorb sunlight and transfer heat to the surrounding ice, weakening it. The ice immediately adjacent to these structures is almost always thinner.
- Pressure Cracks and Seams: As ice expands and contracts with temperature changes, it forms cracks and seams. While some might refreeze, others can remain open or thinly covered, creating weak lines across the lake. These are often difficult to spot, especially under snow.
- Shallow Water vs. Deep Water: While not a hard and fast rule, shallow areas tend to freeze first and can sometimes be safer, as long as there aren't heavy currents. However, deep water near shore can also freeze effectively. The key is consistency, not necessarily depth.
- Snow Cover: As mentioned earlier, heavy snow acts as an insulating blanket, preventing further ice growth. It also makes it impossible to visually assess the ice quality beneath. Always be extra cautious on snow-covered ice.
Before heading out to popular destinations like Higgins Lake or Torch Lake, always check local conditions, talk to bait shop owners, or consult online forums for the most up-to-date information. They can often provide insights into specific trouble spots that might not be obvious to the casual observer.
How to Measure Ice Thickness Safely
You’ve got your gear, you’ve checked the forecast, and you’re ready to hit the ice. But before you step out, you absolutely must know how to safely and effectively measure the ice thickness. Guessing is not an option. Relying solely on tracks from other anglers can also be misleading, as conditions can change rapidly. A hands-on, methodical approach to ice assessment is your best friend when it comes to hardwater fishing.
Essential Tools for Ice Assessment
To truly know what you're stepping on, you'll need a few key tools. These aren’t optional extras; they are vital safety equipment:
- Spud Bar: This is arguably the most crucial tool for initial ice assessment. A spud bar is a long, heavy metal bar with a chisel-like point on one end. As you walk, you repeatedly strike the ice ahead of you. If the spud bar goes through with one or two strikes, the ice is too thin. If it takes multiple, heavy strikes, you’re likely on safe ice. It's an active, real-time way to check strength and thickness. You can find durable spud bars from brands like Eskimo or Strikemaster, often available on Amazon.
- Ice Auger: Whether it's a hand auger, a gas auger, or an electric auger, this is how you'll get a precise measurement. After using your spud bar to confirm preliminary safety, drill a hole and measure. For deep dives into specific auger types, check out our guide on Best Ice Augers for Michigan Ice Fishing.
- Tape Measure: A standard retractable tape measure is indispensable for accurately gauging the ice thickness once you’ve drilled a hole. Make sure it's long enough to reach the bottom of your ice hole and account for any slush or snow layers on top.
- Ice Picks: These aren't for measuring, but they are absolutely critical safety equipment. Worn around your neck, they allow you to pull yourself out of the water if you fall through. Many excellent models are available on Amazon.
- Rope/Throw Bag: A length of sturdy rope, ideally with a throw bag, can be used to help rescue someone who has fallen through, or to be pulled out yourself. It's a fundamental piece of rescue gear.
- Life Jacket or Flotation Suit: This is a non-negotiable item. Wearing a life jacket or a full flotation suit (which also provides warmth) significantly increases your chances of survival if you go through the ice.
Step-by-Step Ice Measurement Process
Don't just drill one hole near the shore and assume the entire lake is safe. Ice conditions can change dramatically across a body of water. Here’s a detailed process for safe ice assessment:
- Start from Shore (or a known safe spot): Always begin checking ice thickness from a place you know is safe. This usually means the shoreline or an access point where others have confirmed conditions. Never just jump onto the ice without initial checks.
- Spud Bar Every Few Steps: As you venture onto the ice, use your spud bar to strike the ice ahead of you. Aim for three to four solid hits per strike. If the bar punches through easily, retreat immediately. This technique is especially important when crossing pressure cracks or areas with visible snow cover, which could be hiding weaker ice.
- Drill Initial Test Holes: After you've walked out a bit (and confirmed with your spud bar that the ice feels solid), drill your first actual test hole with your auger. Measure the ice thickness precisely with your tape measure.
- Check for Consistency: Continue drilling test holes at regular intervals as you move further out or towards your chosen fishing spot. A good rule of thumb is to drill a test hole every 20-30 yards, or more frequently if you notice any changes in ice appearance (e.g., from clear to white ice, or patches of slush). This helps you map out safe zones and identify thinner areas.
- Observe the Ice Quality: Pay attention to the color and texture of the ice you're drilling through. Clear, hard ice means good quality. White, slushy, or honeycombed ice means reduced strength, even if the thickness seems adequate.
- Be Wary of Inconsistencies: If you find a sudden drop in thickness, or a patch of weaker ice, do not proceed in that direction. Turn back or detour significantly. Ice conditions can change abruptly, especially on large, diverse bodies of water like Lake St. Clair, which is known for excellent fishing but also unpredictable ice.
- Mark Your Path: If you're in an unfamiliar area or visibility is poor, consider marking your safe path with flags or reflective markers, especially if you plan to travel by snowmobile or ATV. This can prevent you or others from inadvertently straying into dangerous areas.
- Re-evaluate Daily (or hourly): Ice conditions can change with surprising speed due to temperature fluctuations, strong winds, or snow accumulation. What was safe yesterday might not be safe today. Always re-evaluate the ice when you arrive at your fishing spot, even if you were there the day before.
Remember, the goal is not just to find some ice, but to find consistently safe ice. Your vigilance and adherence to these safety practices are the most effective way to ensure a memorable and safe ice fishing experience in Michigan.
Disclaimer
Fishing on ice can be extremely dangerous. The information provided in this guide is for general informational purposes only and should not be considered a substitute for personal judgment, local knowledge, and adherence to all current Michigan Department of Natural Resources (DNR) regulations and safety advisories. Ice conditions are highly variable and can change rapidly. Always exercise extreme caution, use appropriate safety gear, and consult local authorities or experienced anglers for the most up-to-date ice conditions before venturing onto any frozen body of water. No ice is 100% safe. The author and publisher assume no liability for any accidents, injuries, or fatalities that may occur from the use of this information.